 I have been using Citavi for reference management since 2006 and I still believe that it is fantastic (although version 3 caused some serious drawbacks in my workflow and I sometimes even have thoughts about downgrading back to version 2.5, but this is not the subject of this post). Since 2011, I am also a huge fan of Evernote and I am trying to put as much of the information that I might be looking for at some point into Evernote so that I find it without even thinking about where I might have stored it. In addition, Evernote’s Google Search integration for Chrome even lets me find information I already have when I’m looking for it on the net. A logical consequence of this is that I would like to combine the strengths of managing my literature and quotations/excerpts with Citavi with Evernote, which is great but will never replace a proper reference management program.
I have asked the Citavi folks to integrate a feature that allows you to upload content from citavi directly into Evernote using the Evernote API or perhaps this ommand line interface (I’m not a programmer). Unfortunately, they say that they have to prioritize other features and they might be right from the perspective of developing their product.
So I figured out a way to get all my stuff from Citavi into Evernote anyway: the trick is to basically print your whole database into an HTML file, open it in a browser, and use Evernote clipper to copy that file as a note into Evernote. Here is how you could do this (see difficulties further below):
1. Select File | Save Project Bibliography | Annotated project bibliography (“Liste mit zusätzlichen Angaben” in German). The bibliography is created based on the current selection except if none is selected. So if you want all titles to be included, make sure you have no titles currently selected)
2. Select whatever information you want to be included from the list. Above all, you should select “Quotations”, because these are the most important bits of information that you want in Evernote, right?
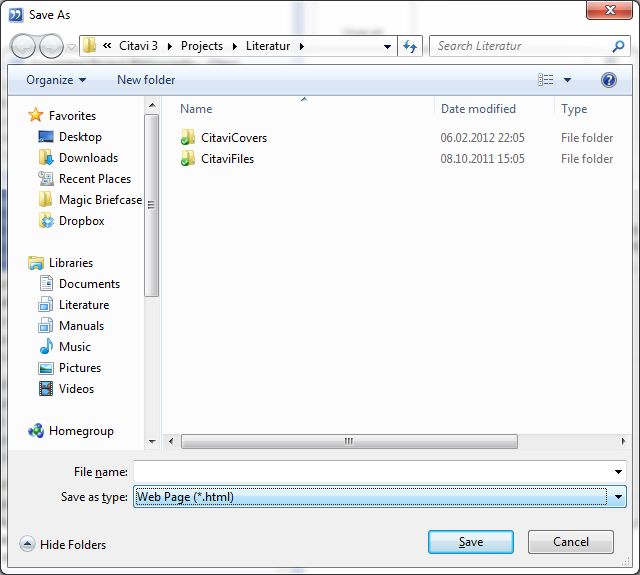
3. Save your bibliography as Web Page (*.html)
If you have a large database, this can take a while. So be patient. Your Citavi hasn’t crashed. (To give you an idea, my ~3000 references took about 3 minutes to save.)
4. Open saved file in browser and clip to Evernote like you would do with any webpage.
Now this is what I have done so far. The problem is: it doesn’t work if you have a lot of records in Citavi. Or to be more precise: if the resulting HTML file contains more than 5242880 Unicode characters. This is an additional limit to Evernote notes which they have unfortunately not advertized because “because the vast majority of our users never hit this limit when creating a single note” (EN support). I discuss this issue in more detail in a separate post.
So I am currently trying to find a way around this. Simply speaking, I have to divide my huge database into several smaller bibliographies. I guess, what I will do is to select titles in Citavi depending on the date they were last updated and the create Bibliographies for each year or six months or so and upload them as separate notes into Evernote (Citavi always saves the bibliography for the current selection or – if there is no selection – for the whole project).
What about the free floating thoughts in Citavi?
The method describe above can only export information associated to titles. Free floating thoughts will not be saved in the HTML file(s). If you want to have also your Citavi thoughts in Evernote, you need to export them seperately by going to the Knowledge Module and select File | Print compilation | Print with options. You can also use “save compilation” instead, but going through “print” gives you a print preview where you can check if things are the way you want them. Once you see that preview, just go to File | Export to a new file and you can save as HTML file instead of actually printing.
Let me know if this is working for you or if you have any improvements to suggest.


